
GuideMortal Shell II
Mortal Shell II Parry Guide: All 4 Combat Seals Explained
Your Seal, not your reflexes, decides how parrying works, and the Slayer Seal quietly costs you achievements on that save.
VerdictLearn the game on Untarnished, then move to Vatra's Harden; take Infinite only if you trust your timing, and keep Slayer off any achievement save.
This Mortal Shell II parry guide starts with the thing nobody tells you: there's no single parry button. There are four Seals, you can equip only one, and each changes what your defense button does. Untarnished guards, Vatra's Seal brings back Harden, Infinite is a pure parry with no safety net, and Slayer isn't about defense so much as turning your sidearm into a Break tool, at the cost of achievements on that save. If parrying feels bad three hours in, check which Seal you're wearing before you blame your reflexes.

Sponsored

About the game
Mortal Shell II
Cold Symmetry
Updated 2026-10-16: Corrected the Slayer Seal (it disables achievements on the whole save file, not only while equipped) and the Harden description (an early Harden only blocks; an on-time Harden is what throws enemies back). Removed claims we could not source: hidden early-block requirements on Untarnished, Sekiro-style tap blocking, an unlinked player quote and a "Halberd Knight" practice tip. Added Seal locations, red unblockable attacks and our video sources.
Sponsored

Mortal Shell II parry guide: how combat actually works (quick answer)
| Seal | Where you get it | Defense | Payoff | Catch |
|---|---|---|---|---|
| Untarnished | Forlorn Village | Guard, Perfect Guard | Perfect Guard deals Break | No animation cancel; Guard breaks after too many hits |
| Vatra's | Garick's Den | Harden, Perfect Harden | Perfect Harden deals Break and refills the bar | Cooldown on normal Harden |
| Infinite | Marrow Keep (Sester Genessa) | Parry only | Heavy Break, about three Perfect Guards | Miss and you take the full hit |
| Slayer | Forgotten Crossbow | Changes how you build Break | Sidearms deal Break; ripostes restore Health and Resolve | Disables achievements on that save |
Cold Symmetry hasn't published a complete official breakdown of the Seals. The table and everything below come from the official patch notes plus three community sources we checked line by line: the dtgre Seals guide and two YouTube breakdowns, by P4wnyhof and lowhound1.
Mortal Shell II parry guide: key takeaways
- Four Seals control defense, and only one can be equipped at a time
- Untarnished is the only Seal that lets you move while blocking, but it can't cancel out of your own swing
- Vatra's Harden and the Infinite parry both work mid-attack
- An on-time Harden throws the enemy back and refills the Harden bar; an early one just absorbs the hit
- Infinite removes Guard and Harden entirely: big Break on a hit, full damage on a miss
- Attacks with a red glowing circle can't be guarded, Hardened or parried: dodge them
- No exact frame window exists for any Seal in any public source as of this article
Overview
This guide reflects the Aug. 20, 2026 full release and the official notes through the October 13 hotfix. It covers how the four Seals work, what a successful block or parry does, and what nobody has documented yet. It doesn't cover weapon movesets, Shell abilities beyond how they touch defense, or a full boss list.
For the wider route through the game, pair these combat notes with the Mortal Shell II complete guide and the Corrupted Gates walkthrough.
One prerequisite: Mortal Shell II has no stamina bar. The Steam page sells combat "unrestricted by stamina," and P4wnyhof's breakdown puts it bluntly: "there is no stamina bars," so you can keep swinging as long as the enemy lets you. What you do manage is Resolve, the meter above your health, which pays for your gun, Shell abilities and special attacks. It refills "by hitting enemies, killing enemies, and guarding, parrying" and Hardening, so every Seal also feeds your Resolve.
 Shells like Proxima bring their own active and passive abilities, which sit on top of whichever Seal you equip.
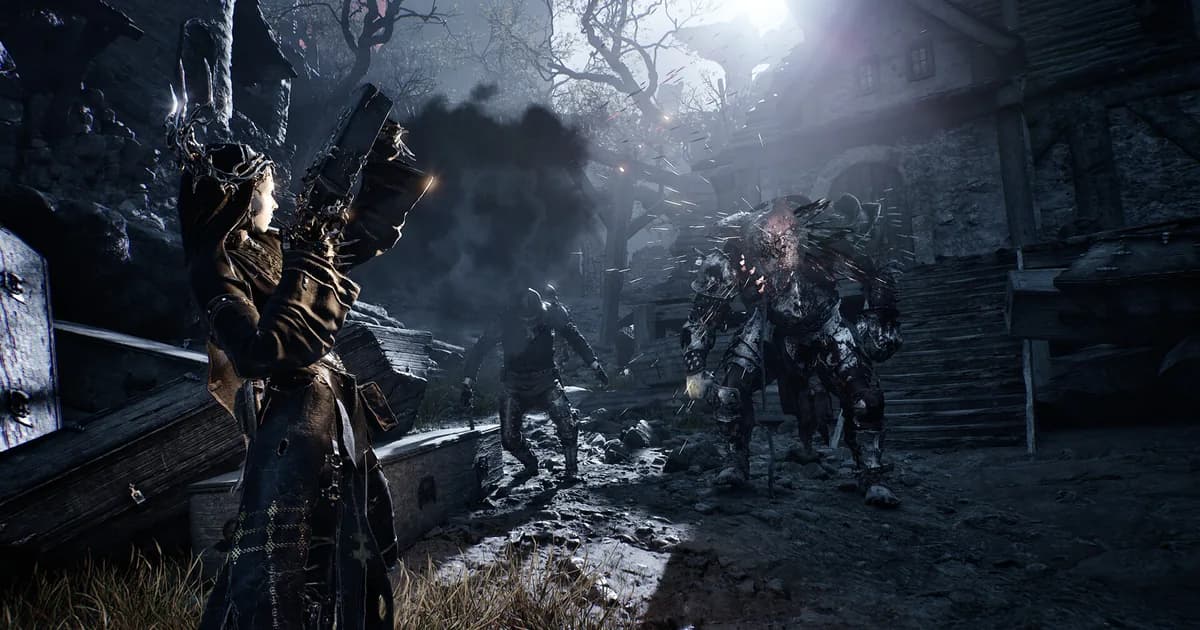
Screenshot: Steam store page
Step-by-Step: the four Seals explained
1. Start with Untarnished: learn enemy patterns with a guard that forgives a mistimed Perfect Guard.
2. Switch to Vatra's: once you know the patterns, Harden lets you defend mid-combo and chain Perfect Hardens.
3. Try Infinite for Break speed: only when you trust your timing, since there is no guard behind a missed parry.
4. Treat Slayer as a separate playstyle: use it for a ranged Break loop on a save where achievements don't matter.
That order follows lowhound1's advice: "if you're doing your first run of this game, use the untarnished seal. Learn the enemies, learn the combat," then switch to Harden once you're comfortable.
Untarnished Seal: the starting guard
You pick this up in the Forlorn Village. It gives you Guard, plus a Perfect Guard if you time the guard just before a hit connects. Perfect Guard deals Break; a plain Guard doesn't, and it "can eventually be broken after absorbing too many attacks," per the dtgre guide.
Two traits define it. First, there's no animation cancel. P4wnyhof shows it plainly: "if I swing and then try to guard, I cannot get out of the swing." Commit to an attack and you're committed to its recovery. Second, it's the most forgiving Seal when you mistime things. lowhound1 calls it "the only seal that allows movement while blocking" and "the only seal that allows you to fail your perfect block attempts," because a missed Perfect Guard still leaves you guarding.
The timing rule follows from that. P4wnyhof: "rather guard too early... than guard too late." Early, you still block. Late, you eat the hit. Cold Symmetry's September 5 update also "fixed minor timing issues with the Untarnished Seal," so if it felt inconsistent at launch, that wasn't only you.
Vatra's Seal: Harden returns
Vatra's Seal, from Garick's Den, brings back Harden. Hold the button and you "will 100% not take damage from the next hit," as P4wnyhof puts it, after which a grey bar in the bottom left has to recover. Attacks and movement pause while you're Hardened, and when the Harden breaks, your current attack picks back up.
Timing changes the result. In P4wnyhof's words, "if you harden too early, no damage taken. If you harden on time, the enemy gets thrown back." That on-time version is the Perfect Harden: it deals Break and refills the Harden bar instantly, so you can chain it against elites and bosses. It's also an animation cancel, usable in the middle of your own swing. P4wnyhof's comparison with guarding: "the guarding doesn't make them stumble back," while Harden "actually has them clawing off your body."
The limit is the cooldown on a regular Harden. lowhound1 argues that's deliberate: without it, Harden "would instantly and undebatably be the best seal."
Infinite Seal: the all-or-nothing parry
You earn Infinite at Marrow Keep through Sester Genessa's training. It strips out Guard and Harden and leaves you a parry. Land it and you take no damage and deal heavy Break, roughly three Perfect Guards or three Perfect Hardens' worth, per dtgre; miss it and you take the full attack. P4wnyhof's verdict: "you pretty much have one chance to hit it."
The upside is flexibility. Like Harden, the parry works mid-swing; P4wnyhof swings at an enemy and can "parry right out of this." The official September 5 update widened the window for consecutive parries "into the wind-up animation, allowing a string of incoming hits to be parried instead of only the first one." No frame count has been published, so learn each enemy's animation rather than chasing a number.
Some players were already chaining parries before that patch. In an August r/MortalShell PSA, one player wrote that "so long as you manage to land the parry the first time, there is no recovery window and you can immediately parry again," and called Infinite "closer to a Sekiro deflection, with a harsh punishment for missing." The September change made the follow-up parries easier to time.
Slayer Seal: a ranged Break loop, not a fourth parry
Don't equip this expecting new parry tech. Slayer, found after Merrick sends you toward the Forgotten Crossbow, makes your sidearms deal Break, and ripostes restore some Health and some Resolve. The loop becomes: shoot to build Break, close in, riposte, recover.
The catch is concrete. Per dtgre, "Equipping the Slayer Seal disables achievements on that save file," and the game warns you when you equip it. Players report the restriction sticks to the save even after you take Slayer off. Collecting the Seal doesn't trigger it; equipping it does. Cold Symmetry has patched Slayer twice since launch: the September 24 hotfix "fixed a bug that made the Slayer Seal unresponsive," and the October 13 hotfix "fixed several Slayer Seal/Punch issues."
GODEEPER: Another souls-like where the whole game turns on getting one deflect right, and a mana economy built around landing it. Kristala Combat Guide: Parry Timing and Mana Loop Tips →
Tips
Dodge anything red
Attacks with a red glowing circle can't be guarded or parried. P4wnyhof: "the red attacks mean dodge. You cannot block them. You cannot harden." The Week 1 patch also gave Urrig's spin a proper warning that it can't be parried.
Guard early on Untarnished
If a block feels like it should have worked and didn't, you were probably late. On Untarnished an early guard still blocks, so err on the early side until you know the enemy.
Break posture, then riposte
Whichever Seal breaks an enemy, the follow-up is a riposte. Cold Symmetry's Week 1 update gave ripostes "a full pass": riposte damage now scales with enemy health, invulnerability is consistent between ripostes, and the riposte itself calculates and applies its damage, which fixed cases where it landed twice or not at all. The moment posture breaks, go for it.
The Mortal Shell II weapons tier list is useful when choosing a weapon to pair with your Seal, while the main boss guide covers encounters beyond this parry-focused article.
 Enemy variety is part of why one "parry timing" doesn't hold across encounters: read each wind-up on its own.
Screenshot: Steam store page
GODEEPER: A different action-RPG that also builds its whole combat identity around a tight parry-and-dodge window, with its own build implications. Crimson Desert Combat Guide: Parry, Dodge, and Builds →
Common Mistakes
Jumping to Infinite too early. It has the biggest Break payoff, but no guard behind a missed parry. If you don't yet know an enemy's wind-ups, Untarnished or Vatra's will keep you alive while you learn them.
Leaving Untarnished on forever by default. It's the right Seal to learn on, but it can't defend mid-swing. Once you're comfortable, try Vatra's: Harden lets you stay aggressive and still answer a hit.
Treating the Slayer Seal as a free upgrade. It changes how you build Break and costs you achievements on that save. Equip it on a separate save if you want to try it.
If achievements are part of your route, check the Mortal Shell II achievements guide before equipping Slayer. For the broader combat verdict, see the Mortal Shell II review after you have tested the Seals yourself.
Use the Mortal Shell II walkthrough when exploration, rather than combat timing, is what is blocking progress.
Frequently Asked Questions
How does parrying work in Mortal Shell II? There isn't one parry input. Defense runs through four Seals, and only one can be equipped at a time. Untarnished guards, Vatra's Hardens, Infinite parries with no guard fallback, and Slayer turns your sidearms into a Break tool.
Does Harden come back from the original Mortal Shell? Yes, through Vatra's Seal. Harden early to take no damage; Harden on time for a Perfect Harden that throws the enemy back, deals Break and refills the bar. Normal Harden runs on a cooldown.
What is the Infinite Seal in Mortal Shell II? The all-or-nothing parry Seal. It removes Guard and Harden; a successful parry blocks all damage and deals heavy Break, while a miss means you take the full hit. You can parry out of your own swing.
Why can't I block mid-attack with the Untarnished Seal? It has no animation cancel, so you have to wait for your swing to finish. In exchange it's the only Seal that lets you move while blocking, and a failed Perfect Guard still leaves you guarding.
What does the Slayer Seal do? Sidearms deal Break damage, and ripostes restore some Health and Resolve. Equipping it disables achievements on that save file, and the game warns you first.
Is there an exact parry timing window in Mortal Shell II? No public source states one. No official mechanics writeup or patch note has published a frame count or millisecond window for any Seal as of this article.
What happens when you break an enemy's posture in Mortal Shell II? It opens a riposte. The Week 1 patch made riposte damage scale with enemy health and made invulnerability consistent between ripostes.
Do Shells still work the same as in the original Mortal Shell? Shell possession carries over. Cold Symmetry's Official Gameplay Reveal showed three playable Shells, Tiel the Acolyte, Eredrim the Venerable and Proxima the Broodseeker, each with its own abilities on top of your equipped Seal.
References
- Mortal Shell II on Steam: official store page, price, reviews and combat description
- Official Gameplay Reveal announcement: Cold Symmetry's post naming Tiel, Eredrim and Proxima
- Week 1 Update, official Steam announcement: the riposte pass and Urrig's spin warning
- September 5 update, official Steam announcement: the consecutive Infinite Seal parry window and Untarnished timing fixes
- September 24 hotfix, official Steam announcement: fixes an unresponsive Slayer Seal
- October 13 hotfix, official Steam announcement: fixes several Slayer Seal/Punch issues
- Mortal Shell 2 Seals guide (dtgre): Seal locations, effects and the Slayer achievement warning
- You're Blocking Wrong in Mortal Shell 2 (P4wnyhof, YouTube): Guard, Parry and Harden shown in play
- Parry Mechanics | Mortal Shell II (lowhound1, YouTube): Seal comparison and a first-run recommendation
Related Reading
- Mortal Shell II Complete Guide: 8 Shells, Seals, and Gates: the central hub for Shells, Seals, exploration, bosses, weapons, and achievements.
- Mortal Shell II Review: Great Combat, Rough Second Half: the full verdict on whether the combat this guide covers is worth the second half's rougher pacing.
- Kristala Combat Guide: Parry Timing and Mana Loop Tips: another souls-like where a single deflect input, not a set of interchangeable Seals, decides the whole combat loop.
- Crimson Desert Combat Guide: Parry, Dodge, and Builds: how a different action-RPG splits parry and dodge into separate systems with their own build tradeoffs.
- Cursemark Boss Guide: Launch Bosses and Routes (2026): a boss-by-boss breakdown for a different Early Access souls-like, useful for comparing how tight other games keep their punish windows.
- Dark Scrolls Complete Guide: All 9 Heroes and Zones 2026: a broader hub for a co-op roguelike with its own take on timing-based defense.
Was this guide helpful?
About the author

Action & Design Desk
GameBrief's byline for platformers, horror and action games. Dry, short paragraphs, strong opinions about tutorials and boss design.
- Action, platformers and horror
- Tutorials, onboarding, boss design
- Sources listed per article
Keep reading

Mortal Shell II Review: Great Combat, Rough Second Half
Reviews · 8 min

Mortal Shell 2 Weapons Tier List: All 8 Ranked + Infusions
Guides · 10 min
Mortal Shell II Walkthrough: All 6 Corrupted Gates (2026)
Guides · 13 min

Mortal Shell II Complete Guide: 8 Shells, Seals, and Gates
General · 16 min

Mortal Shell II Achievements Guide: All 53 Confirmed
General · 11 min

Mortal Shell II Boss Guide: 10 Major Fights + Tar Golem
General · 10 min
Sponsored
More game deals
Disclaimer
This article is published for informational and entertainment purposes. It does not constitute professional financial, legal, or technical advice. Game performance, online services, patch schedules, and store listings change. Verify critical details (pricing, system requirements, regional availability) with publishers and storefronts before you buy. Affiliate links, where present, help support our editorial work and are labelled in our affiliate disclosure.