
GameBrief · Guides
Subnautica 2 Scanner Room? Scanner Station Guide (2026)

Subnautica 2 scanner room searches point to the Scanner Station. The name is different from the original game, and so is the current system. In the Early Access build, this is an interior base facility that scans a defined area for resources, wrecks, and anomalies, then lets you turn useful contacts into HUD signals.
TL;DR: Scan a Scanner Station fragment to unlock the blueprint, craft it with one System Chip, three Titanium, and one Wiring Kit, and place it inside your habitat. The station scans a spherical 300-meter radius, uses 10 energy per second, and lets you choose a filter, select a matching contact, and create a signal on your HUD. The current system is not the old game’s camera-drone-and-upgrade-module setup.
Subnautica 2 scanner room? (quick answer)
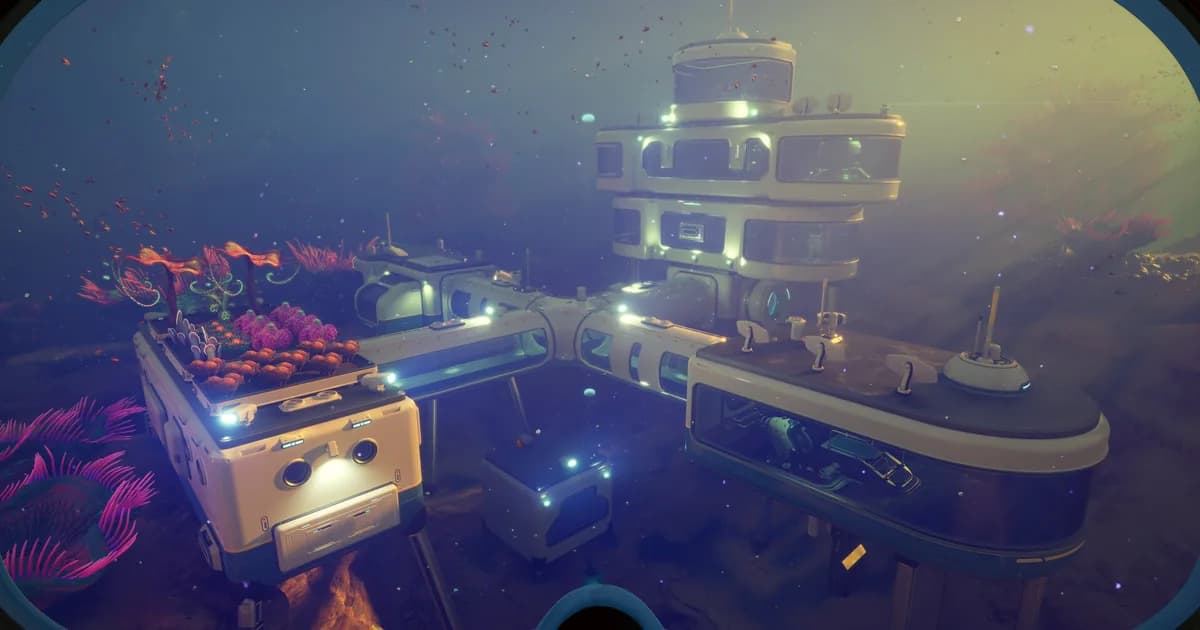
Subnautica 2’s current “scanner room” is the Scanner Station. It is an interior facility, not a separate vehicle or a remote camera network. The station produces a holographic map of scan contacts around the base. You can choose a resource or other available category, select a contact, and place that contact as a navigation signal.
The important numbers are straightforward:
- Scan radius: 300 meters, described as a spherical radius around the station.
- Power use: 10 energy per second.
- Current recipe: one System Chip, three Titanium, and one Wiring Kit.
- Blueprint: unlock it by scanning a Scanner Station fragment.
- Filter behavior: one filter can be active at a time, and a filter appears when a matching signal is in range.
That means the best early setup is a powered habitat with the station positioned where its radius covers the zone you actually want to search. There is no verified reason to wait for a mythical “mid-game” module tier, and the current references do not describe camera drones or Speed and Range Modules for this facility.
Current status: September 2026
Subnautica 2 is still in Early Access on Steam. The official store snapshot checked for this update listed the game at $29.99, with English reviews at 93% Very Positive from 71,783 reviews and recent reviews at 88% Very Positive from 2,150 reviews. Steam also describes the game as actively developed, so names, recipes, filters, and power values can change between updates.
This guide therefore treats the Scanner Station values below as the current Early Access snapshot, not a promise that the final 1.0 version will use the same numbers. If your in-game recipe differs, trust the live Habitat Builder and the current station interface first.
Key takeaways
- Search for Scanner Station when you want the Subnautica 2 facility.
- Scan a Scanner Station fragment before expecting the blueprint in the Habitat Builder.
- The current listed recipe is one System Chip, three Titanium, and one Wiring Kit.
- The station’s stated scan radius is 300 meters in a sphere around the facility.
- A scan is useful because it can find resources, wrecks, and anomalies and turn selected contacts into HUD signals.
- Only one filter is active at a time, and a category only appears when a matching contact is available inside the scan area.
- Budget 10 energy per second for the station.
- Recipe Data Cards are the current upgrade path described by the guide references.
- Old Scanner Room advice about camera drones, Speed Modules, and Range Modules does not describe the current Subnautica 2 station.
Step-by-Step: How to build and use the Scanner Station
Step 1: Find and scan a Scanner Station fragment. The blueprint is tied to scanning a Scanner Station fragment. The current guide references point to fragments at Camp One and Old Habitat. Explore those locations with the scanner and interact with the fragment when you find it. Scanning the fragment is the unlock step; do not assume that simply owning a Habitat Builder makes the facility available.
Step 2: Check the Habitat Builder after the scan. Once the fragment has been scanned, open the interior-facility section of the Habitat Builder and look for Scanner Station. If it is not listed, check that the scan completed and that the fragment was the Scanner Station fragment rather than another base object. Early Access interfaces can change labels, so compare the displayed recipe with the live station entry.
Step 3: Gather the current recipe. The current recipe listed by the Subnautica 2 guide references is one System Chip, three Titanium, and one Wiring Kit. Put those materials in your inventory before choosing a location. The System Chip and Wiring Kit make the station a more deliberate investment than a basic habitat piece, so it is reasonable to place the first one at a base you expect to use for more than one resource run.
Step 4: Place it inside a powered habitat. Scanner Station is an interior facility. Attach or place it as part of your habitat layout rather than treating it as a free-floating scanner in open water. Leave enough room to reach the station interface, and check your base power budget before activating it. The current references list a drain of 10 energy per second, which is a continuous cost worth planning around.
Step 5: Open the holographic map. Interact with the station to view its scan area. The current description is a spherical 300-meter radius. The holographic map does not replace physical terrain knowledge: a contact can be behind a wall, above a ledge, below a trench, or on the other side of a route you cannot safely swim. Use the map to choose a direction, then read the terrain and threat situation yourself.
Step 6: Select a filter. Choose the category you need in the station interface. Only one filter is active at a time. A category is useful only when a matching contact exists inside the station’s current range, so an empty filter is not proof that the resource is absent from the entire biome. It only tells you that the current station has no matching contact to display at that moment.
Step 7: Turn a contact into a HUD signal. Select a matching contact on the map to place a signal on your HUD. The signal gives you a navigation target while you leave the base and travel to the contact. The guide references also describe resource signals disappearing after the resource is harvested, so treat the marker as a live task rather than a permanent map pin.
Step 8: Use Recipe Data Cards for supported upgrades. The current Scanner Station references describe Recipe Data Cards as the upgrade route. Do not use an old Scanner Room recipe list as a substitute. Apply the data card shown by your live game and re-check the station interface after each update because the Early Access upgrade pool can change.
The Scanner Station interface is the place to choose a filter and inspect contacts inside the station’s scan radius.
What the 300-meter scan radius means
The 300-meter value is a radius, not a flat rectangular area. Think of the station as the center of a sphere. Moving the station to another habitat changes which part of the world falls inside that sphere. A base at the edge of a resource field can cover more of the unexplored side than a base placed deep inside an already-cleared area.
The radius also explains why one station cannot answer every resource question. If a target is outside the sphere, changing the filter will not make it appear. Build a second station at another base when you need coverage in a different zone, or move your planning base closer to the area you intend to search. The facility is a local scanning tool, not a global database of every resource in the world.
Use the map as a route-planning aid. First identify which contacts are inside range. Then look at the actual terrain between the habitat and the target. A signal can tell you that something is nearby without telling you that the straight-line route is safe or physically possible. Treat depth changes, cave entrances, and hostile fauna as separate navigation problems.
Filters, contacts, and HUD signals
The current filter workflow has three distinct actions:
- Choose a filter category.
- Select one of the matching contacts on the holographic map.
- Create a HUD signal for the selected contact.
Keeping those steps separate prevents a common misunderstanding. Selecting a filter does not automatically place every matching object on your HUD. It narrows the available scan view; you then choose the contact that deserves a navigation marker. Likewise, seeing a blank category does not mean that the resource never spawns. It means the station has no matching contact inside its active range at that time.
The current Scanner Station guide describes the system as covering resources, wrecks, and anomalies. The references list current resource categories including Titanium, Copper, Quartz, Silver, Gold, Salt, Sulfur, Lead, Celestine, Atacamite, and Conduit Crystal. Treat that list as an Early Access snapshot and verify the live filter names after a patch.
When a resource signal disappears after harvesting, that is useful feedback. It tells you that the marker represented a real contact rather than a generic point of interest. If you still need more of that material, return to the station and select another matching contact instead of following a stale marker.
The station is easiest to use alongside the rest of the survival loop. Review the Subnautica 2 biomes guide before choosing a forward habitat, and use the Subnautica 2 creature guide to recognize threats on the route. If a signal sends you toward a deep area, pair it with the Subnautica 2 Leviathan Guide and the Subnautica 2 Oxygen and Survival Guide rather than following the marker blindly.
Power and placement checklist
Because the station uses 10 energy per second in the current references, power is part of the build rather than an afterthought. Before a long scan session:
- Check that your base has enough generation for the station and every other active module.
- Place the first station where its 300-meter sphere overlaps the zone you plan to farm.
- Keep the interface accessible so you can change filters without rebuilding the habitat.
- Leave room for the rest of the interior layout instead of blocking doors or ladders.
- If the station stops producing useful contacts, check power and range before assuming the filter is broken.
The best location depends on your objective. A station at a starter base gives convenient access to nearby materials. A temporary forward base can be more efficient when you are working in a remote zone. The correct choice is the one that puts the radius around the area you want to scan, not a universal “best base” coordinate.
For the rest of the habitat plan, see the Subnautica 2 Base Building Guide and the advanced base-building guide. The Subnautica 2 beginner guide covers the early tools that make a first station practical, while the Subnautica 2 vehicles guide explains what transport is actually available in the current Early Access build.
A useful scan is a route-planning step: choose a contact, create its HUD signal, and then verify the physical route before leaving the habitat.
What this guide does not carry over from the original game
The phrase “scanner room” invites advice from the original Subnautica, but the current Subnautica 2 references do not support copying that system word for word. This article previously described camera drones, Speed Modules, Range Modules, four upgrade slots, and a drone scouting loop. Those claims have been removed because the current Scanner Station references instead describe a 300-meter scan radius, filters, contacts, HUD signals, and Recipe Data Card upgrades.
That distinction matters when you search for build advice. A result that says “install Range Module first” may be describing the original game or an unsupported early draft, not the current Subnautica 2 facility. Use the live Habitat Builder recipe and the station’s own interface as the final authority whenever a patch changes a name or menu.
Practical Scanner Station route
For a normal resource run, use this short routine:
- Return to the habitat and check the station’s power.
- Open the holographic map and choose the category you need.
- Inspect the matching contacts and select one that is inside a sensible route.
- Create the HUD signal.
- Leave the habitat with the equipment needed for the terrain and depth.
- Follow the signal while checking caves, ledges, and hostile fauna manually.
- Harvest the contact, then return for the next signal if the category still has targets.
This route keeps the station in the role it currently supports: a local search and navigation aid. It does not promise that every resource will be visible, that the shortest line is safe, or that the station replaces exploration. It simply removes some of the guesswork from finding a matching contact inside the active radius.
The resource list also connects to the Subnautica 2 Resources Guide and the food and hunger guide. Those guides are useful when a scan identifies a material but the trip itself will take longer than one oxygen or food cycle.
Frequently Asked Questions
What is the scanner room called in Subnautica 2? The current facility is called the Scanner Station. “Scanner room” remains a useful search phrase because players use the old name, but the current Early Access references use Scanner Station.
What is the Scanner Station recipe? The current listed recipe is one System Chip, three Titanium, and one Wiring Kit. You must first unlock the blueprint by scanning a Scanner Station fragment.
How far does it scan? The current references describe a spherical 300-meter radius. The station only finds contacts inside that local scan area.
Can I put every resource on my HUD at once? The current filter description says one filter is active at a time. Select the category you need, then select a matching contact to create its HUD signal.
What if a filter is empty? An empty filter means the station has no matching signal in its current range at that moment. It is not proof that the resource is absent from the whole biome.
Does it use base power? Yes. The current references list 10 energy per second. Check your generation before relying on the station during long sessions.
References
- Subnautica 2 on Steam: official Early Access listing and current store snapshot.
- Scanner Station guide: current name, 300-meter scan radius, recipe, filters, signals, power use, and upgrade references.
- Scanner Station blueprint: independent recipe and interior-facility reference.
- PC Gamer Subnautica 2 tips: practical Scanner Station location and 300-meter overview.
- Subnautica 2 Base Building Guide: habitat construction and power planning.
- Subnautica 2 complete guide hub: survival, biomes, base building, and related guides.
Related Reading
For the wider resource loop, the Subnautica 2 Resources Guide covers material locations and fabrication planning. The Subnautica 2 Base Building Guide explains habitat placement and power decisions, while the Subnautica 2 Oxygen and Survival Guide covers safe dives after a Scanner Station signal points you toward a target.
Was this guide helpful?
About the author

Games Critic
Games writer and reluctant optimist who has reviewed over 400 titles across 9 years. Irish, currently in Berlin. Has strong opinions about tutorial design.
- 400+ games reviewed across 9 years
- Platformer and horror specialist
- Narrative design focus
Keep reading
Subnautica 2 Deep-Sea Base Guide: Power and Co-op Tips
Guides · 10 min
Subnautica 2 EULA Explained: What Krafton's Terms Mean
General · 8 min
Subnautica 2 Vehicles: All Submersibles in Early Access 2026
General · 16 min
Subnautica 2 Hotfix 2: Full Patch Notes and Changes
General · 4 min
Subnautica 2 Co-op Guide: Setup, Roles, and Strategy
General · 15 min
Subnautica 2 Leviathan Guide: Avoid, Scan, Survive
Guides · 8 min

Disclaimer
This article is published for informational and entertainment purposes. It does not constitute professional financial, legal, or technical advice. Game performance, online services, patch schedules, and store listings change. Verify critical details (pricing, system requirements, regional availability) with publishers and storefronts before you buy. Affiliate links, where present, help support our editorial work and are labelled in our affiliate disclosure.
Comments
Loading comments…